A toilet that refills long after a flush usually has one of two problems: water is escaping from the tank into the bowl, or the fill valve isn’t shutting off. The sound can be identical, but the repairs are different. Replacing a fill valve won’t stop a leaking flapper, and a new flapper won’t fix water spilling into the overflow tube.
A running toilet belongs on the same household-efficiency checklist as finding and fixing major sources of home energy waste, though this waste generally shows up on the water bill. You can usually narrow down the cause by removing the tank lid and watching one refill cycle. Don’t buy parts until you’ve seen where the water goes.
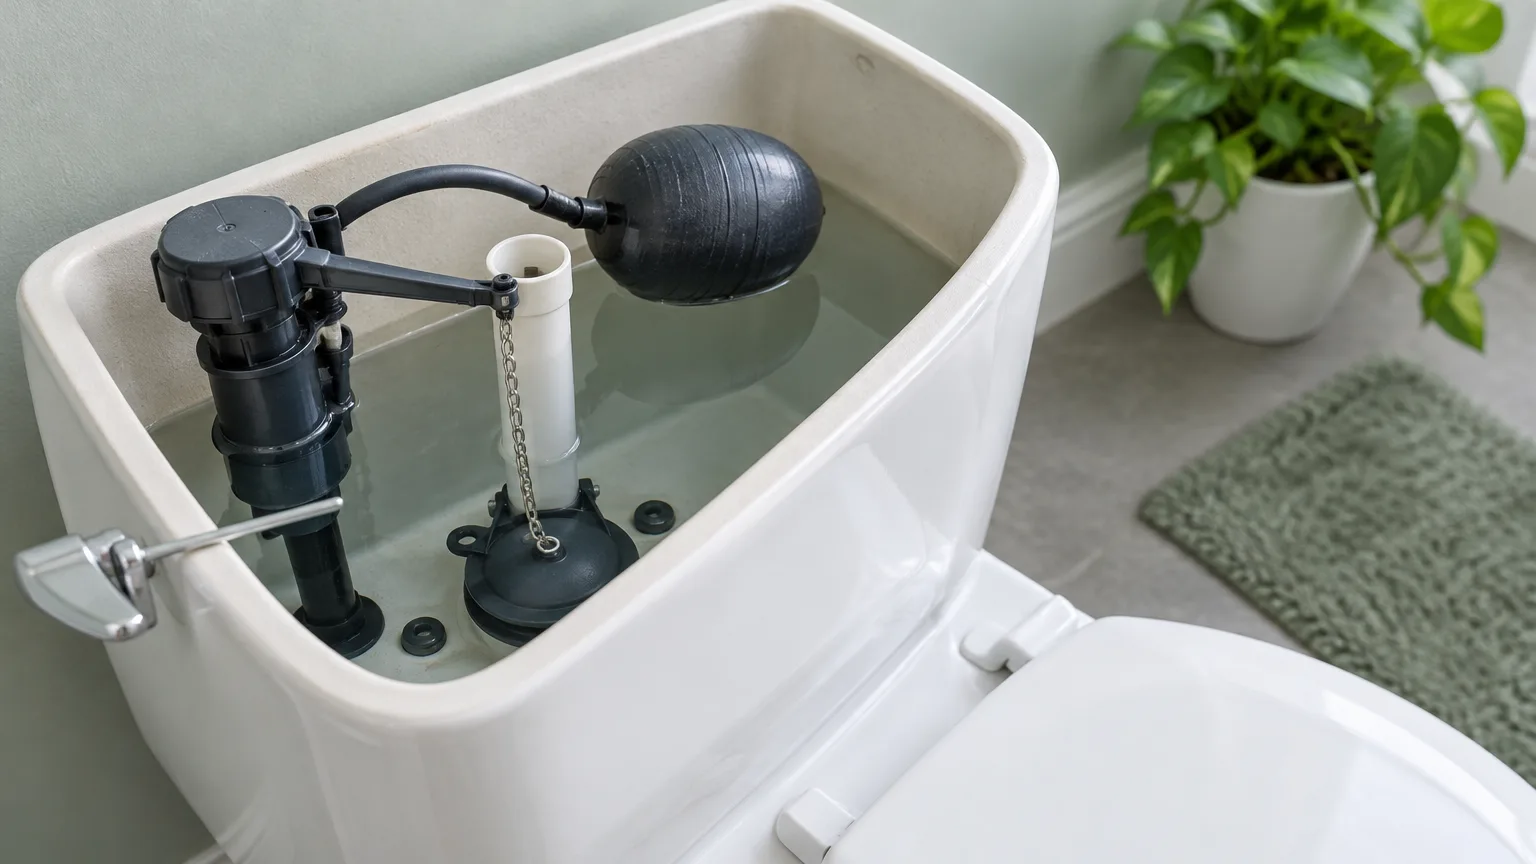
The steps below apply to toilets with a conventional tank. If yours has a push-button, tower, or canister-style flush mechanism, the diagnosis is similar, but the replacement seal may differ from a standard flapper.
Start with the water level, not the sound
Set the tank lid somewhere safe, then flush and watch the tank refill. The large opening at the bottom is the flush valve; on many toilets, a rubber flapper covers it. The tall, open-ended pipe beside it is the overflow tube. The fill valve brings fresh water into the tank, while its float rises with the water and tells the valve when to stop.
Once the tank appears full, look for one of these patterns:
- Water pours over the top of the overflow tube. The fill valve is allowing the tank to fill too high, often because the float is set too high or the valve isn’t closing.
- The water stays below the overflow tube, but the valve turns on again later. Tank water is likely escaping. Check the flapper or other flush-valve seal first.
- The valve keeps running while the water level stays below the overflow tube. Look for water passing through the flush-valve opening, a refill tube pushed too far into the overflow tube, or a fill valve that won’t shut off.
- Water is outside the tank or on the floor. That’s a different problem. Check the supply connection and tank for leaks, and shut off the toilet’s water supply if water is escaping onto the floor.
A brief flow through the small refill tube during a normal refill isn’t, by itself, a fault. That tube directs water toward the bowl. What matters is whether flow stops when the tank is full.
Test whether the tank is losing water
If the toilet runs for a few seconds every so often—even though nobody has flushed—it may be refilling water that leaked into the bowl. You can check without taking anything apart.
Put a few drops of food coloring or a toilet dye tablet into the tank, taking care not to flush. Wait about 10 minutes, then look in the bowl. If color appears, water has crossed from the tank into the bowl. Flush afterward so the dye doesn’t stain the toilet. The EPA’s toilet leak test identifies a worn flapper as a common cause, but the test alone doesn’t prove that the flapper is the only faulty part.
You can also close the toilet’s supply valve, mark the tank’s water level, and check it again after about 30 minutes. A falling level confirms that water is leaving the tank even with the fill valve off. If the level stops falling around the height of the flush-valve seal, inspect that seal. If it keeps dropping below the seal, the flush-valve assembly may be leaking elsewhere.
If the shutoff valve is stuck or starts leaking when you turn it, don’t force it. Arrange a repair before attempting work that requires the water to be off.
Check the flapper, chain, and sealing surface
The flapper should lift when you press the handle, then settle flat over the flush-valve opening when you release it. Watch it through a flush. If it lands crooked, floats against another part, or stays slightly raised, water can continue to pass into the bowl.
Check the chain before replacing anything. It needs enough slack for the flapper to close fully, but not so much that loose links get caught beneath it. Also check that the handle arm moves freely and returns after a flush. A chain adjustment or removal of a snag may solve the problem without a new part.
If the flapper closes but still leaks, turn off the supply and flush to lower the tank water. Inspect the rubber for distortion, damage, or a surface that no longer sits flat. Wipe away loose debris from both the flapper and the rim it rests on. That rim—the flush-valve seat—must be clean and sound: a new flapper can’t make a reliable seal against a damaged seat.
Replace a flapper that is worn or won’t seal after cleaning and adjustment. Match the replacement to the toilet rather than choosing by appearance alone. Flapper sizes and designs vary, and some toilets use a tower or canister seal instead. A photo of the mechanism, the toilet’s model number, or the old part can help you find the correct replacement flapper or seal.
For a conventional flapper, the job usually involves shutting off the water, flushing, unhooking the old flapper from its mounting points, and attaching the new one in the same position. Reconnect the chain with slight slack, restore the water, and flush several times. Follow the instructions for the part you bought; adjustable flappers may also need to be set for a proper flush. If a correctly fitted new flapper still leaks and the seat is visibly damaged, the flush valve itself may need repair or replacement.
If water enters the overflow tube, inspect the float
Water continuously spilling over the overflow tube points to the fill side of the tank. First, see whether the float moves freely as the tank fills. A float cup can catch on the tank wall or another part; an older ball float can be obstructed by the handle mechanism. Clear any interference you can see.
Next, compare the tank water level with the toilet’s marked waterline, if it has one, and the top of the overflow tube. The water should stop below the overflow opening. Don’t rely on a universal measurement for every toilet: use the tank or fill-valve markings and the manufacturer’s instructions when available.
If the float is free but set too high, lower it a little using the adjustment on your fill-valve model. Flush and let the tank refill before judging the result. Make small changes. Setting the level unnecessarily low may weaken the flush without fixing the underlying problem.
A useful test is to gently lift a float cup by hand while the valve is running. If the water stops, the valve can respond to the float; check its adjustment and freedom of movement. If water continues despite the float being raised, the fill valve may have debris inside it or a worn seal. Fluidmaster’s fill-valve troubleshooting instructions describe both the float test and servicing a valve that still won’t shut off. Follow instructions for your own model before opening a valve.
Know when the fill valve needs replacing
A fill valve doesn’t automatically need replacement because it makes noise. It may simply be doing its job repeatedly because the flapper is leaking. Diagnose a possible tank leak first, especially if the valve switches on for short bursts between flushes.
Focus on the fill valve when the float moves freely, the tank reaches its intended level, and water still keeps flowing—or when lowering the float doesn’t stop water from overflowing. Some valves can be cleaned or fitted with a new internal seal. Others are damaged or impractical to service. If cleaning and adjustment don’t restore a dependable shutoff, replace the valve with one compatible with the toilet.
Replacing a fill valve means shutting off the supply, draining the tank, disconnecting the supply line beneath it, and removing the old valve’s mounting nut. Set the new valve’s height and water level according to its instructions, reconnect the supply, then watch it fill and check beneath the tank for drips. Don’t overtighten plastic fittings or tank hardware. The fill-valve installation steps and model-specific adjustments are worth reading before you loosen anything.
Check the small refill tube before buying a part
The narrow tube running from the fill valve should direct water into the overflow tube during a refill. On a conventional setup, its end is held at the top by a clip, not shoved deep down the overflow pipe. If it extends too far inside, it can siphon water and cause the fill valve to switch on again. Repositioning it may solve what looks like a faulty flapper or fill valve; follow your toilet’s instructions if its flush mechanism uses a different connection.
After any adjustment or replacement, flush several times and let the tank fill completely. Confirm that the water stops below the overflow opening, the seal closes cleanly, and the supply connections stay dry. Then listen again later for an unexpected refill. If the toilet still runs after you’ve verified the water level, seal, and refill tube—or if the repair involves a cracked tank or a leaking supply connection—it’s time to call a plumber.